- Home /
- Construction Details /
- Wood Frame with 4" Rigid Exterior Insulation & Siding /
- Flanged Window Detail in Framed Wall with 4" Ext Insulation /
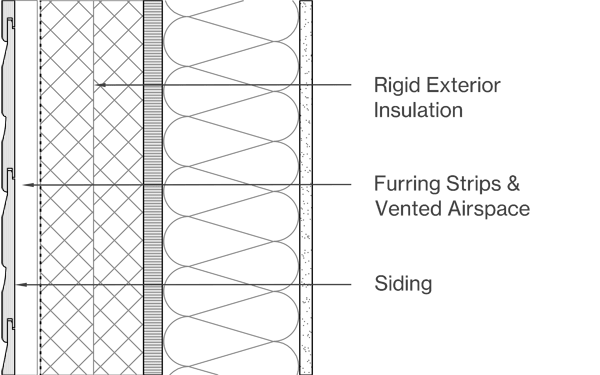
Wood Frame with 4" Rigid Exterior Insulation & Siding
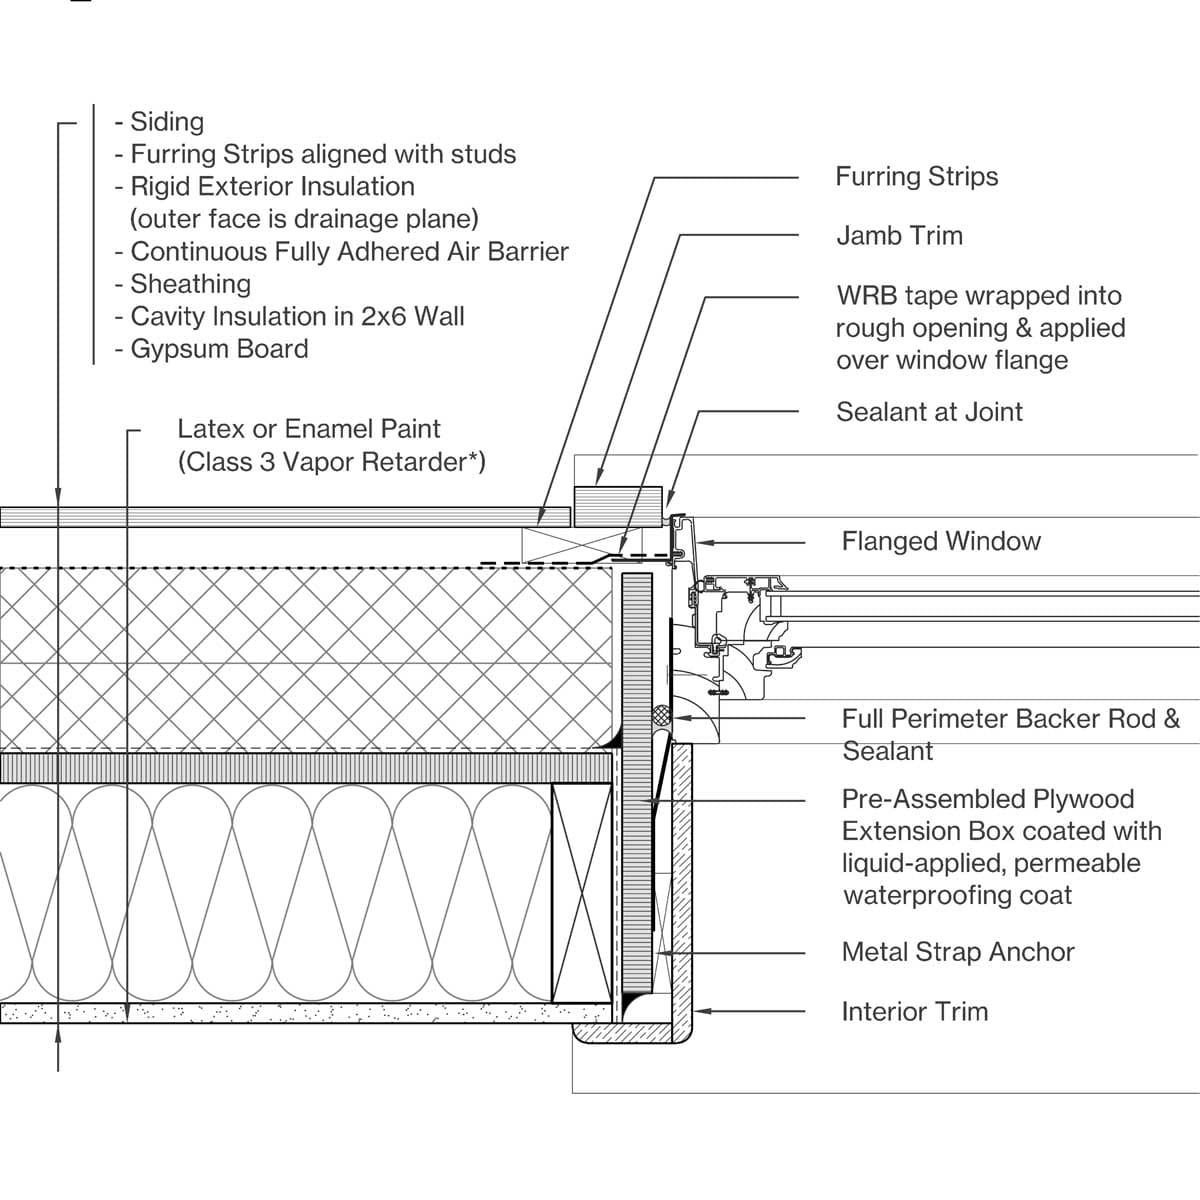
Flanged Window Detail in Framed Wall with 4" Ext Insulation
R-35 Wall
Head
(Detail 1/3)
Sill
(Detail 2/3)
Jamb
(Detail 3/3)
Notes
This window detail uses a two stage seal to insure no water or air can infiltrate into the building. The exterior seal is installed by applying WRB tape over the window head flange. No tape should be applied over the window sill flange to allow the window to drain. The interior seal is added by installing a full perimeter backer rod & sealant joint. Expanding foam or special tapes can be used instead of sealant, however a backer rod should still be installed to prevent the foam from completely filling up the cavity and preventing the system to drain. Plastic shims should be used to level out the window in the rough opening. These shims elevate the window slightly, which creates a space for water the drain.
To create a continuous air barrier, the pre-assembled plywood extension box needs to be sealed to the wall's fully adhered air barrier and the window with sealant joints.
* Whether or not you need a Class II or III Vapor Barrier depends on your climate zone, location and amount of exterior insulation. Refer to Wall Barriers Notes section below for more info.
Building Science Courses on Acelab
Adapt this detail & find the right products
Learn how you can adapt this detail based on your climate zone & desired aesthetic
Wall Barriers
Understand how climate affects wall specifications, learn whether you should use a vapor retarder, & discover suitable products.
Climate Zone
Option 1/3
Wall Design with Unfaced EPS or XPS
Design Requirements

Should you use a vapor retarder?
Enter your state and county above to see whether you should use a vapor retarder
Recommendation & calculations are based on the methods described in the Builder’s Guides from the Building Science Corporation and are only valid for residential occupancies.
Notes
This wall is designed with vapor semi-impermeable rigid insulation, like unfaced XPS or EPS. Whether a Class II or Class III Vapor Retarder needs to be used depends on the project's climate zone and the amount of exterior insulation that is installed. Class II Vapor Retarders can be either a separate membrane, like a 'Smart Vapor Retarder' (SVR), or kraft facing on the cavity insulation.
A Class III Vapor Barrier, like Latex Paint, can only be used when the R-value of the exterior insulation is larger than the R-value of the cavity insulation multiplied by a climate coefficient. The formula above shows the climate coefficient after you've selected your state and county.
Product Options
Browse curated materials for this construction detail.
XPS
Rigid foam panels that are water repellent and offer good thermal performance at mid-range prices.
Smart Vapor Retarder (SVR)
Class II vapor retarders with variable permeance that block vapor in low, but not in high humidity conditions.
Fully Adhered Air Barrier
Membranes that are designed to be airtight, but allow water vapor to pass through.
Fiberglass Batts (Kraft Faced)
Batts made from plastic reinforced glass fibers with a Class II vapor retarding facing.
Fiberglass Batts
Batts made from plastic reinforced glass fibers that are budget-friendly and easy to install.
Mineral Wool Batts
Fiberous batts that are vapor permeable, non-combustible and offer good energy performance.
Loose-Fill Fiberglass
Fiberglass particals that are blown in place that are budget-friendly and offer entry-level energy performance.
Cellulose Spray
Cellulose particlas that are blown in place that offer superior energy performance at a premium price point.
Spray Polyurethane Foam (Closed Cell)
Spray applied expanding foam that is water repellent, airtight and offers superior energy performance.
Spray Polyurethane Foam (Open Cell)
Spray aplied expanding foam that is budget-friendly and offers good acoustical and energy performance.
Cladding
Explore different types of cladding that can be used for this construction detail and find suitable products.
Horizontal Siding
Vertical Siding

Notes

Notes
Vinyl Siding
Vinyl panels that do not require maintenance or treatment and are sometimes built to imitate wood.
Metal Siding
Metal panels that are sometimes built to imitate wood & offer superior durability at a premium price point.
Wood Siding
Horizontal wooden panels that offer a traditional aesthetic, but require a treatment & periodic maintenance.
Standing Seam Panels
Metal panels with concealed fasteners and visible interlocking exterior seams.
Windows
Find different types of windows suitable for this detail.
Budget-Friendly
Affordable windows without a thermal brake that have entry-range energy performance.
Mid-Range
Common windows with a simple thermal brake that provide solid energy performance.
High-Performance
Frames with multi-chambered thermal brakes that deliver a superior energy performance.
Luxury
Specialty windows with thin frames that have an exquisite performance and aesthetics.

